Difference between revisions of "Wetek"
Rick Hunter (talk | contribs) (Created page with "'''Supported receivers'''<br /> frameless|right * Play<br /> '''How to flash the receiver...'''<br /> Download a image from: https://openpli...") |
|||
| (5 intermediate revisions by one other user not shown) | |||
| Line 4: | Line 4: | ||
* Play<br /> | * Play<br /> | ||
| − | |||
| − | + | =='''How to flash the receiver...'''<br />== | |
| − | |||
| − | + | Download a image from: https://openpli.org<br /> | |
| + | Notice: Only a OpenPLi 4 image is currently available.<br /> | ||
| − | + | Unpack the ZIP file and place the content on a USB disk. | |
| − | |||
| − | |||
| − | |||
| − | |||
| − | |||
| − | |||
| − | |||
| − | |||
| − | |||
| − | |||
| − | |||
| − | |||
| − | |||
| − | + | 1. Place the USB disk or mSD-card into the slot of the Wetek and remove the power cable.<br /> | |
| + | 2. Look at the back side and press, with the supplied tool, the '''Upgrade''' button and keep this button pressed for approx 10 seconds during you place the power cable back in the receiver. <br /> | ||
| + | 3. Wait for a minut and you'll see the following screen:<br /> | ||
| − | + | [[File:RECEIVER-Wetek-flash001.jpg]] | |
| − | + | 4. Move the cursor down with the usage of the remote control and select '''Apply update from EXT'''. | |
| − | + | [[File:RECEIVER-Wetek-flash002.jpg]] | |
| − | + | 5. Press the OK button from the remote control and select in the next screen '''Update from udisk'''. | |
| − | + | [[File:RECEIVER-Wetek-flash003.jpg]] | |
| − | + | 6. Select in the next screen the OpenPLi file | |
| − | + | [[File:RECEIVER-Wetek-flash004.jpg]] | |
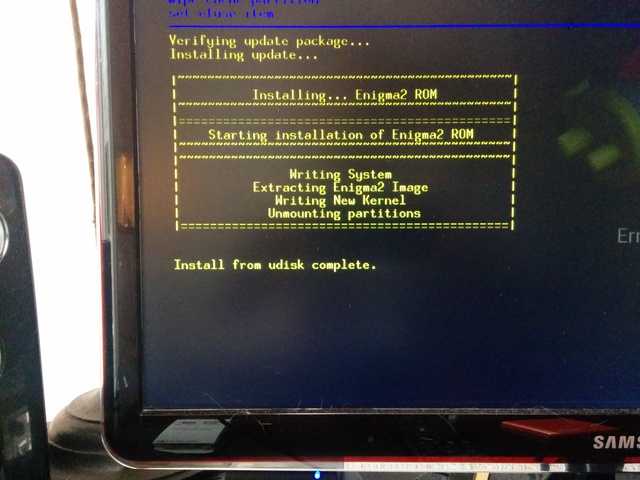
| − | + | 7. Press the OK button and the flashing procedure starts. Wait until the next screen: | |
| − | + | [[File:RECEIVER-Wetek-flash005.jpg]] | |
| − | + | 8. Press the OK button and the first screen reappears. <br /> | |
| + | 9. Select '''Reboot system now'''<br /> | ||
| + | 10. The Wetek receiver starts now like a Enigma2 receiver | ||
Latest revision as of 14:01, 3 March 2018
Supported receivers
- Play
How to flash the receiver...
Download a image from: https://openpli.org
Notice: Only a OpenPLi 4 image is currently available.
Unpack the ZIP file and place the content on a USB disk.
1. Place the USB disk or mSD-card into the slot of the Wetek and remove the power cable.
2. Look at the back side and press, with the supplied tool, the Upgrade button and keep this button pressed for approx 10 seconds during you place the power cable back in the receiver.
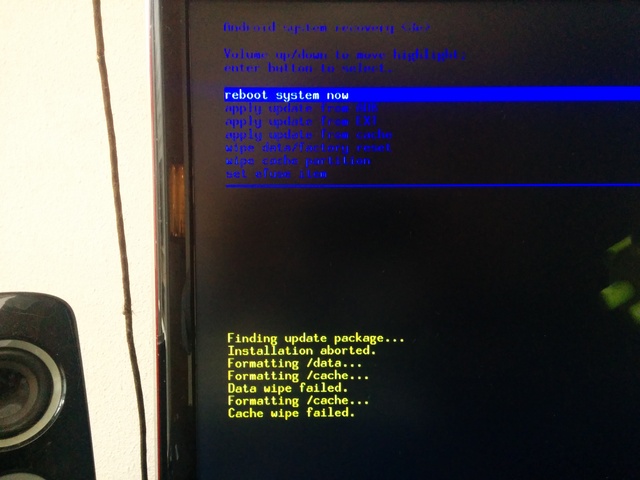
3. Wait for a minut and you'll see the following screen:
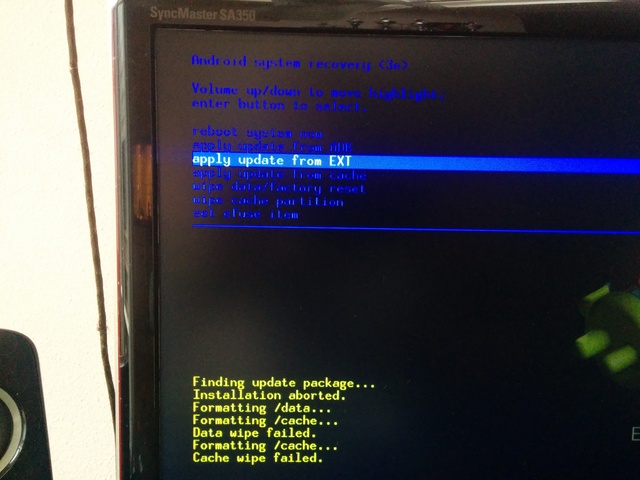
4. Move the cursor down with the usage of the remote control and select Apply update from EXT.
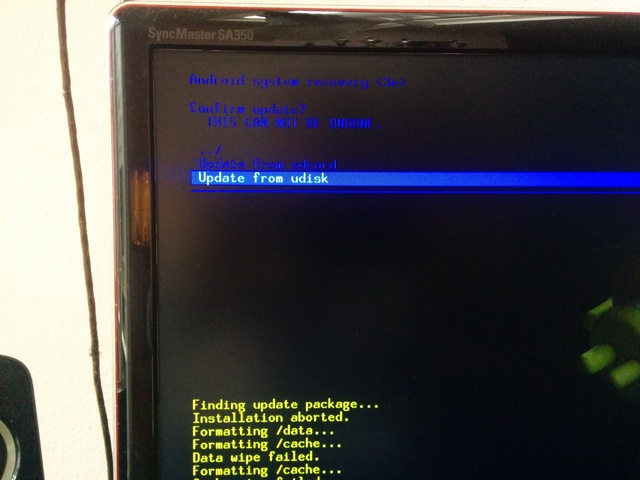
5. Press the OK button from the remote control and select in the next screen Update from udisk.
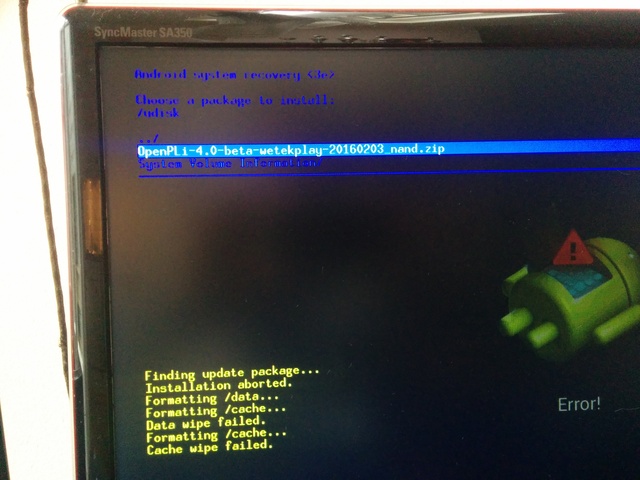
6. Select in the next screen the OpenPLi file
7. Press the OK button and the flashing procedure starts. Wait until the next screen:
8. Press the OK button and the first screen reappears.
9. Select Reboot system now
10. The Wetek receiver starts now like a Enigma2 receiver

