Difference between revisions of "Backup/AutoBackup"
Rick Hunter (talk | contribs) |
|||
| Line 26: | Line 26: | ||
Remove all the USB devices. | Remove all the USB devices. | ||
Make a new USB disk with the image you want to flash your receiver. | Make a new USB disk with the image you want to flash your receiver. | ||
| − | During the flash procedure.. Add the removed USB disk. Do this before the flash has been completed. | + | During the flash procedure.. Add the removed USB disk. Do this before the flash has been completed. ('''*1''') |
Depending the receiver the box will start immediately after flashing. During the first installation when a backup file is found on the USB stick a question is asked whether you wish to restore the previous backup. The default choice is 'yes'. Now the installation process will restore the receiver with the settings that are known before you flashed your receiver. In case you chose 'no' the box is flashed without restoring a previous backup, so you have to setup the box by yourself. In some cases it is better to perform a clean flash to avoid that previous experienced issues are restored. | Depending the receiver the box will start immediately after flashing. During the first installation when a backup file is found on the USB stick a question is asked whether you wish to restore the previous backup. The default choice is 'yes'. Now the installation process will restore the receiver with the settings that are known before you flashed your receiver. In case you chose 'no' the box is flashed without restoring a previous backup, so you have to setup the box by yourself. In some cases it is better to perform a clean flash to avoid that previous experienced issues are restored. | ||
| + | |||
| + | '''(*1)''' Remark.. You can also put the image on the existing USB disk.. but you need to remove the image file after your flash procedure.. If not your receiver will be reflashed if you update your receiver via the software-update option. | ||
Revision as of 22:46, 3 May 2017
When you want to quickly flash your receiver and keep your settings, the AutoBackup plugin is a handy tool that will help you restore the necessary settings after a flash procedure. Settings that are being kept are: All your satellite and bouquet settings, CCcam / Oscam settings, network settings, timer settings, etc. etc. In fact almost all settings.
No plugins are being restored.
Beware: This tool can only be used when there is no major upgrade has been done in Enigma.. E.g. OpenPLi 4 backup. Restore with OpenPLi 5.
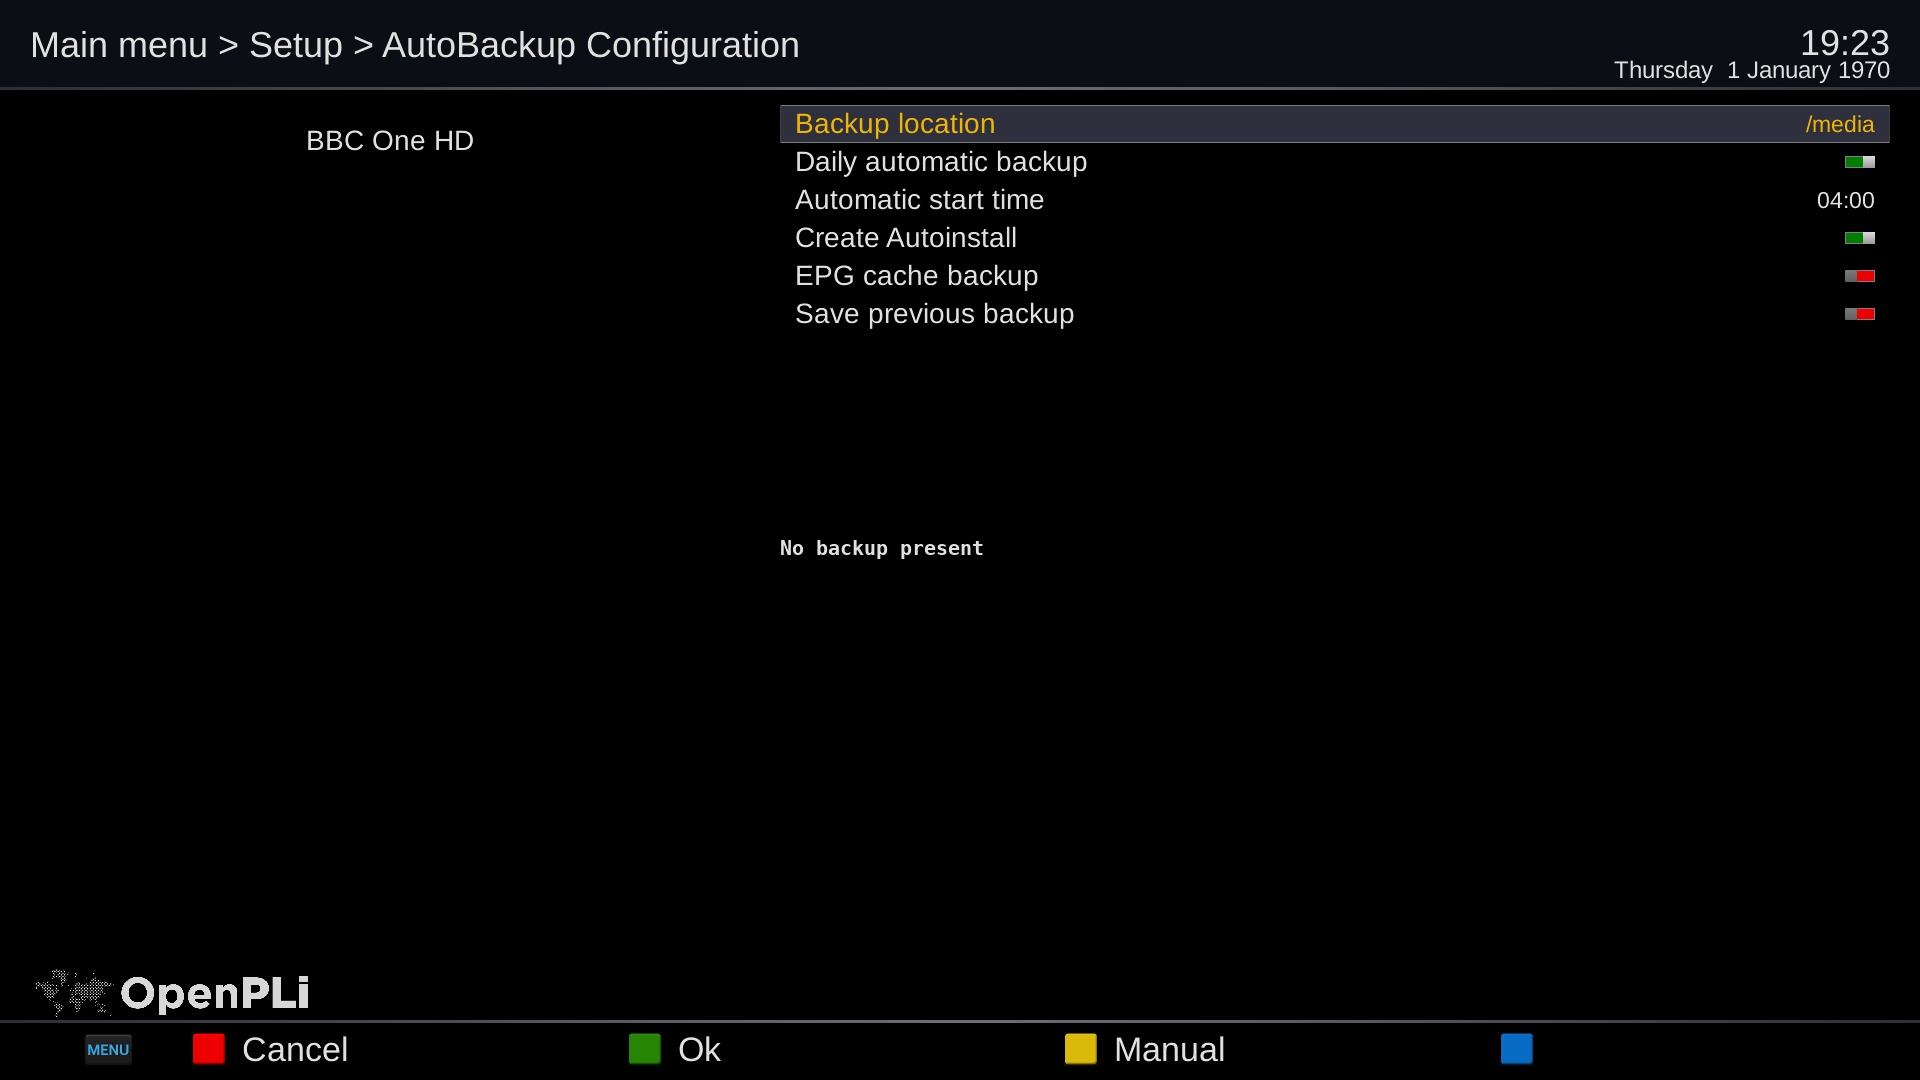
Make an Autobackup
Install the Autobackup plugin
Select a Backup location. Preferable a USB device
Daily automate backup: Enable
Select a time: e.g. 04:00
Create Autoinstall: off
EPG cache backup: off
To test, select the yellow button. If everything is ok, you see the Last Backup date with a recent timestamp.
Use an Autobackup
When you want to flash your receiver with a new software, take the following steps: Remove all the USB devices. Make a new USB disk with the image you want to flash your receiver. During the flash procedure.. Add the removed USB disk. Do this before the flash has been completed. (*1)
Depending the receiver the box will start immediately after flashing. During the first installation when a backup file is found on the USB stick a question is asked whether you wish to restore the previous backup. The default choice is 'yes'. Now the installation process will restore the receiver with the settings that are known before you flashed your receiver. In case you chose 'no' the box is flashed without restoring a previous backup, so you have to setup the box by yourself. In some cases it is better to perform a clean flash to avoid that previous experienced issues are restored.
(*1) Remark.. You can also put the image on the existing USB disk.. but you need to remove the image file after your flash procedure.. If not your receiver will be reflashed if you update your receiver via the software-update option.
