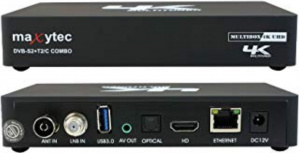
Receivers:Maxytec
There are 2 images you can download:
Recovery image
The "recovery image" gives you a multiboot system, not only between E2 and Android, but also between different E2 images, which you can flash either from the boot menu, or from the image.
Emmc image
If you flash the "emmc" image, you don't have multiboot, but only a single image, like with other boxes.
How to flash / place a new recovery image into the Maxytec Multibox
First download an image on http://openpli.org/download/maxytec/multibox/ and unpack the image on a FAT32 formatted USBstick.
FLASHING THE IMAGE.
- Shut down the power of the receiver by unplugging the 12 volt power at back of the receiver. Personally I prefer to unplug the primary (220 volt) power as there isn’t a power switch present. This appeared to be to expensive? 😮
- Insert the USB stick containing the image files into the side USB 2.0 port on the receiver. (Do NOT use the USB 3.0 port at the back)
- Power on the receiver by connecting the 220 volt power supply or put the 12 volt powerplug into the box.
- Immediately push a paperclip in the small hole at the left side of the box (reset) and hold this for some seconds. The flashing of the recovery image starts.
- Wait for the image to flash. In case your USB stick is equipped with a led you can follow this process as no other indication is present.
- When the flashing process has completed the receiver will automatically reboot.
After having flashed the box it starts to boot and you can continue with the setup or installation wizard of the settopbox.
From a certain moment the procedure has been changed. First download a recovery image) on http://openpli.org/download/maxytec/multibox/ but do not unpack this. Put this unpacked image on the USB stick.
- Shut down the power of the receiver by unplugging the 12 volt power at back of the receiver. Personally I prefer to unplug the primary (220 volt) power as there isn’t a power switch present. This appeared to be to expensive? 😮
- Insert the USB stick containing the packed recovery image into the side USB 2.0 port on the receiver. (Do NOT use the USB 3.0 port at the back)
- Power on the receiver by connecting the 220 volt power supply or put the 12 volt powerplug into the box.
- Immediately push and hold the Power button on the RC. Now the recovery image is being flashed and afterwards the box boots in the recovery mode..
- From the latest recovery image you can perform a local or an online flash of the image you like in a slot you like. for the image to flash.
- When the flashing process (local or online) has completed you can choose which image should start in case you flashed more then one.
After having flashed the box it starts to boot and you can continue with the setup or installation wizard of the settopbox.
